

How To Make Window Decals Cricut
Nearly of my crafting I do as a hobby, but recently I've started making decals for cars equally a side concern.
You lot don't necessarily get a lot of repeat customers, but the word of rima oris spreads and before you know it you're making decals for a whole armada!
(Either manner, it's super fun.)
If you have a Cricut (or whatsoever cut machine), I'll bear witness you how to make motorcar decals using it at dwelling.
If you don't, I also have a method for how to make decals for your automobile by manus.
What is a machine decal?
Car decals are fabricated from adhesive vinyl, designed to final outdoors and work with any smooth, flat surface. You can apply them on your car only they also work neat for laptops, storage containers, or domicile windows.
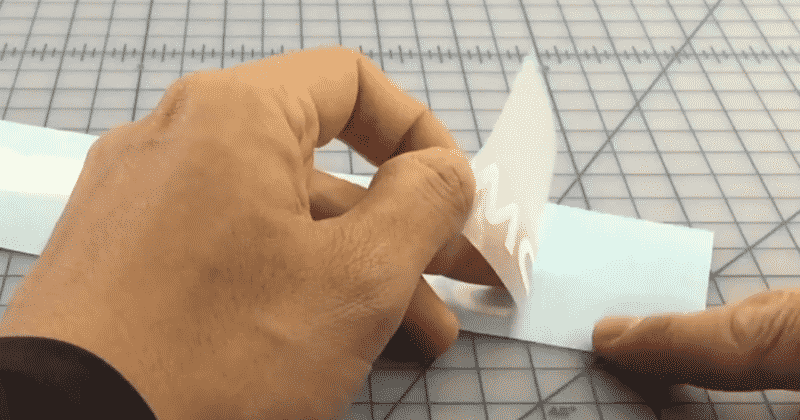
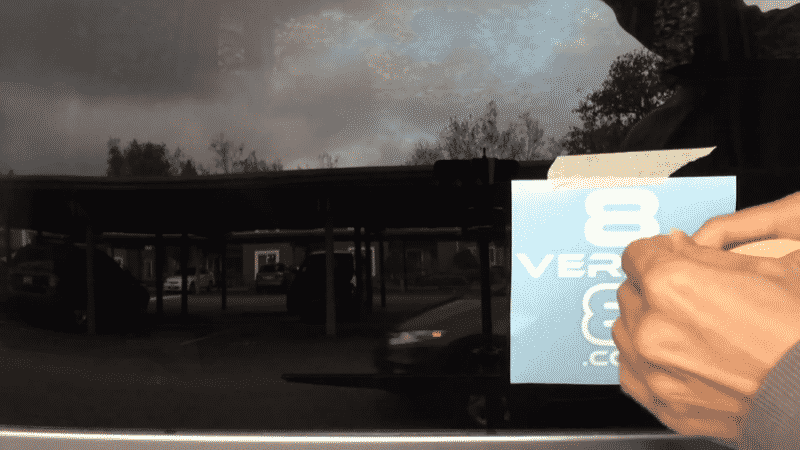
A car decal, once it's fix to use, will accept three parts:
- The backing newspaper, usually an opaque white or blueish
- The vinyl decal itself
- The transfer paper (what the finger is pointing at in the movie beneath)
![]()
I know there are some people out there who feel like having a decal on your auto is a bit tacky, but hopefully that's not you because you're reading my tutorial!
Fifty-fifty if you lot do feel that fashion, at that place'southward a lot more than to them than just window stickers. You tin customize your entire vehicle in a way that looks better than pigment, is more than durable, and can be easily inverse out in the future.
Another benefits:
- You can share your interests with the world.
- You tin can make pretty good money selling your ain.
- Instead of buying something pre-made, you tin can make exactly the vinyl car decal you want.
- They brand really slap-up gifts, even for people without cars!
- If you have trouble finding your auto in the parking lot, they might save you some time? (This 1 might exist a bit of a stretch.)
Are you convinced yet?
Well, if not, perchance y'all'll have fun learning most how to make your ain car decals at home anyhow!
How to make car decals: a DIY tutorial!
Like I mentioned in the introduction, at that place are ii ways to make your own vinyl decals for a car. You can either use a cut machine (like a Cricut Explore Air two, Maker, or Silhouette Cameo four) or you tin DIY by paw.
I'll explain both ways.
Permit's commencement gather upwardly all of the supplies you lot need:
- Cut automobile (optional)
- Masking record
- Scraper/squeegee
- Transfer paper
- Tweezers
- X-Acto Pocketknife
- Tape
- Scissors
- Adhesive vinyl (I recommend Oracal 651)
- A blueprint!
If you don't have a blueprint, I take a pretty nifty collection of costless SVG sites that y'all can check out. SVG files are really piece of cake to work with and y'all tin can calibration them to whatever size yous need.
The techniques of applying decals to a car window are pretty similar, so I'll take you through how to do it with a cutting automobile starting time so past hand after.
The real difference is in how you lot make the window decal, not how you'll apply it.
On to the instructions and tutorial!
Step i – Prepare your pattern
If yous're working with Cricut machines (like the Cricut Explore Air two or the Cricut Maker), Design Space makes it really easy to get started on this project.
Unlike working by hand, you can easily re-size and perfect your design before it touches any materials. In my feel, this makes projects a lot easier to showtime because you aren't worried well-nigh messing up.
Since we're making a vinyl car decal, yous desire to brand sure the design you're picking out is easy to weed.
I'd avert really complicated or distressed fonts for your first project.
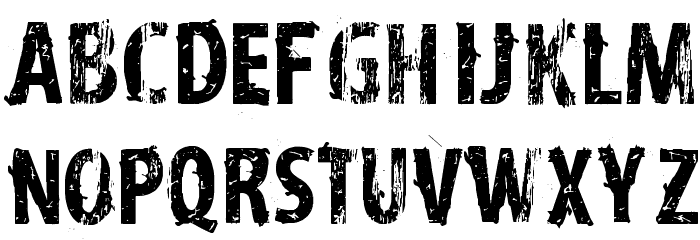
(Meet to a higher place font for what I'd definitely avoid!)
Step 2 – Cut the design
Pretty straight forward! Cutting a pattern for a vehicle window is no different than whatsoever other vinyl project. The only thing that sometimes trips people up here is whether or not to mirror the design.
But mirror your pattern if y'all're placing it on the inside of your car window. Anything going on the outside doesn't demand any modification at all.
(If you are mirroring it, brand sure to choose "horizontal" for the flip!)
For vinyl automobile decals you can use your Cricut Standard cutting mat. Y'all'll place the vinyl on your mat shiny-side up (or colorful side upwards).
Step three – Weed your vinyl
Nothing unusual hither. You lot're going to remove the pieces of vinyl that aren't part of your design. I normally start with the within pieces and work my way out, but either way works fine.
If you demand a hand, check out my guide on weeding vinyl.
Stride 4 – Employ the transfer record
You'll take your transfer record and utilise it over the design. Use your scraper to make sure it's stuck actually well. Y'all'll want to do a quick exam on both sides of the decal to brand sure it's firmly on the transfer tape.
Partially pare one side halfway to make sure it's stuck well, then apply it to the backing again. Echo with the other side as yous can run into in a higher place.
If some of your vinyl is sticking to its bankroll instead of your transfer record when yous examination information technology, merely embrace it back up and brighten for some other few seconds and it should release.
Step 5 – Clean the automobile window
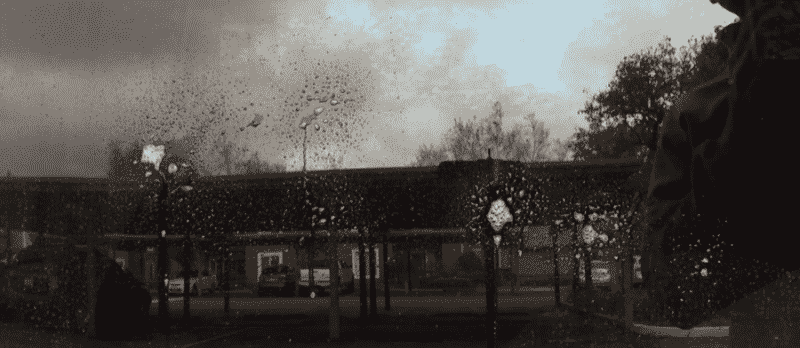
Before you go too excited, if your auto looks anything like mine it might really enjoy getting a scrap of a scrub, at least where y'all're thinking of applying the vinyl to the window.
I don't get too fancy here, I utilise soapy water and make clean the surface where I want to apply the vinyl.
If yous mirrored your design earlier and are applying it to an inside window, you'll exercise the aforementioned thing. I'd avert Windex or glass cleaner, but rubbing alcohol is just fine.
Use a microfiber cloth to dry out it off, and yous're gear up to apply.
Step 6 – Apply the vinyl to your car window
Pretty much the same process as above where you applied the vinyl to the transfer newspaper, now you lot'll place that same paper where you want your blueprint to be.
You'll use your masking tape to hold the decal in position.
If it's a square or smaller decal, you'll lift the decal vertically, remove the bankroll newspaper, and then slowly press downwards from the elevation

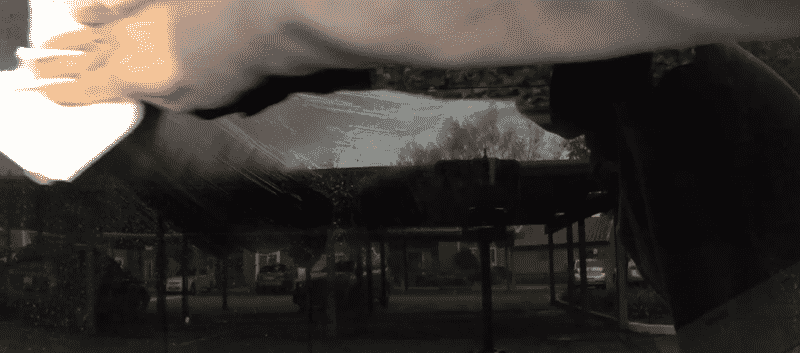
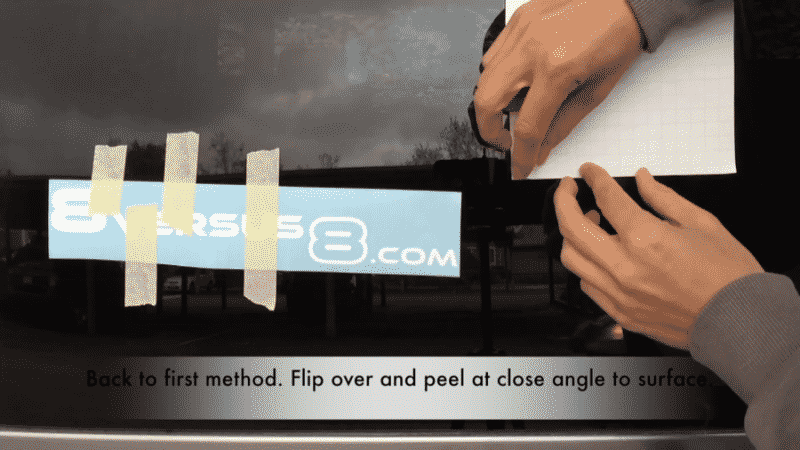
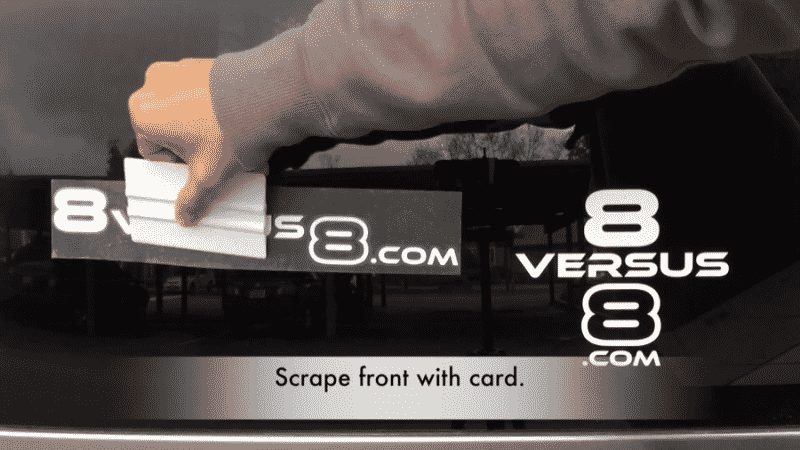
Now that the decal and transfer tape are on the window, you'll use your scraper to evenly utilise the vinyl to the glass.
When yous're peeling the transfer tape make sure to keep a steep bending and do it slowly. Only take a await at the picture for an example.
![]()
![]()
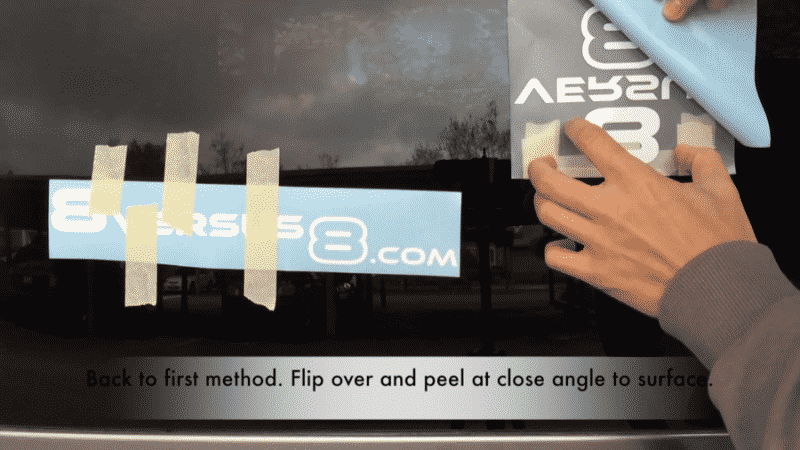
If it'southward a larger, long decal, yous'll want to beginning by putting a piece of masking record down the center, and then tape downward only ane side so you tin apply the other.
![]()
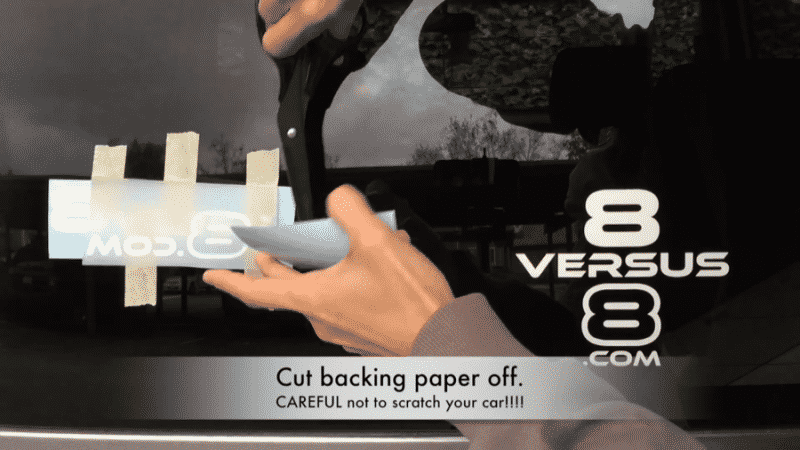
You'll elevator one side of the backing and then cut it off.
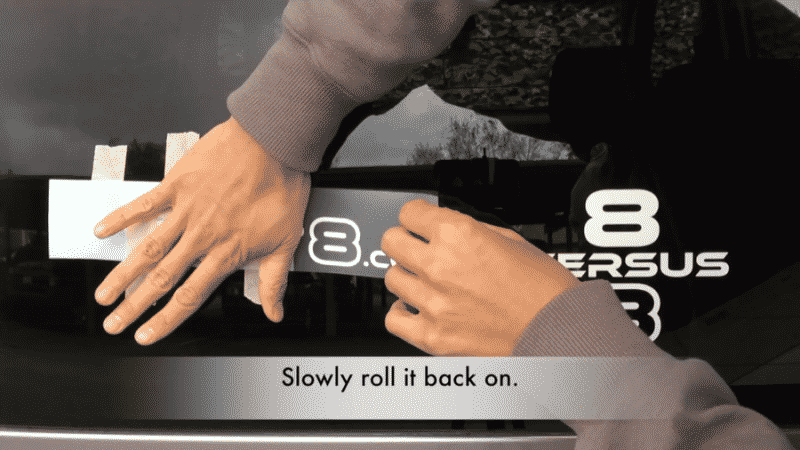
Slowly ringlet the decal dorsum on.
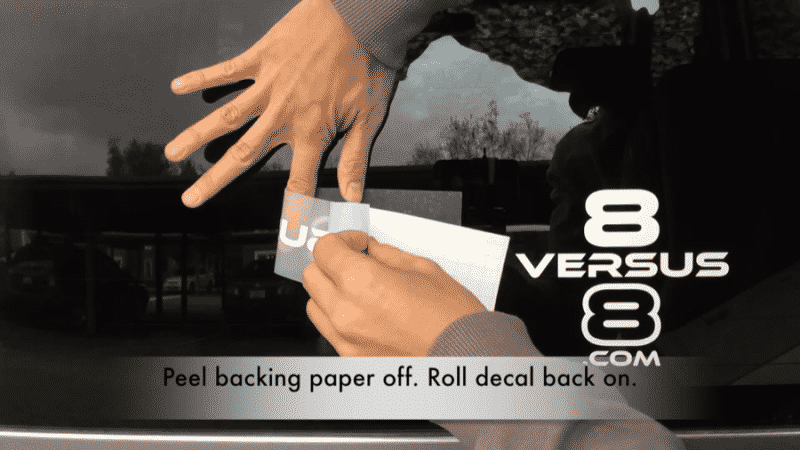
Brighten that side down, remove the masking tape from the other side, so skin the backing and repeat the burnishing.

You'll apply a finger and whorl the decal onto the window.
If the decal doesn't stick, but press the tape back downwardly for a moment, rub it with a finger or fingernail, and so pull once more.
![]()
Printing all corners of the vinyl down with your finger.
You're done!
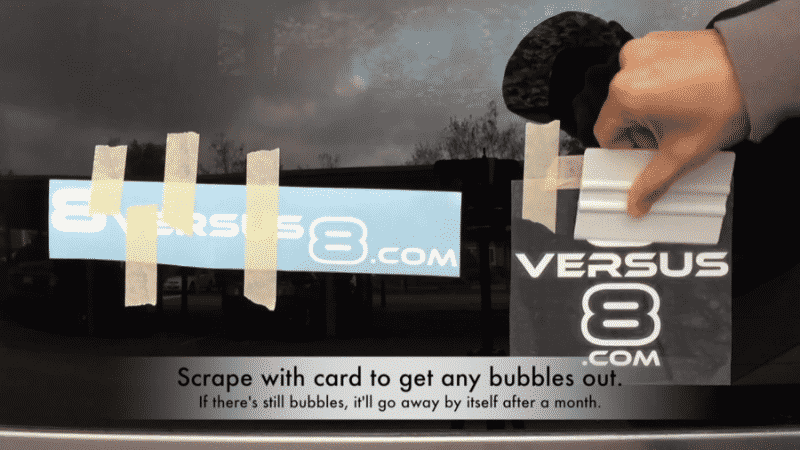
If there are any bubbles, you accept a few options.
- You lot can utilize a small pivot and pop them
- Yous can usually just expect a few weeks and they'll disappear on their ain. <– This is my method of choice.
- You can use a heat gun or hairdryer to become them out
If you don't have a cutting machine, let'due south comprehend a quick technique for making a vinyl decal by paw.
Making a vinyl car window decal by hand
You have a few options hither, the easiest if you don't have a cutting machine is to buy letters or vinyl decals and combine them into a new design. You can observe these pretty easily on Amazon, just pick out a font y'all like along with a pattern and you lot can follow the to a higher place guide to apply them cleanly.
If you want to brand custom vinyl machine decals that you can do at home, you can print out a pattern and basically trace over it.
- Observe the design y'all desire and print it out on regular printer paper
- Catch a piece of adhesive vinyl, and record it to a cutting mat. It should be slightly larger than the design.
- Accept your blueprint and tape that on peak of the vinyl to the same mat.
- Taking your X-Acto Knife, cutting through the outer paper, tracing the outside of the design
- After cut the outside of your design, now cut whatever interior designs out.
- Remove the excess vinyl that you merely cut with your weeding tool. If yous don't accept one, y'all can use tweezers or the tip of the X-Acto Knife you used to cutting. You tin can also remove the tape from the vinyl design at this betoken.
- Have a slice of transfer record and burnish over it to adhere the vinyl to it.
- Following the above guide, making sure your windows are cleaned and dry, apply your decal to your car window.
You're all set up!
I'll now go through what to avert and all of the questions I hear the most, like how to weatherproof your decal sticker, what kind of outdoor vinyl to use, and whether it'southward meliorate to apply your decals to the within window or outside.
What to avoid and tips
- If yous made a fault and are looking to remove the decal (or you just get tired of looking at it!) you should gently heat up the sticker and peel from one corner. If information technology's on a window, you tin apply small amounts of isopropyl booze once information technology starts lifting, but don't heat upwardly and apply the isopropyl simultaneously.
- Brand sure the surface is make clean before applying the vinyl. Most decals that fall off or peel are due to a rough or dirty application of the vinyl. This is true for any decals. Drinking glass is usually a great surface for adherence, simply it has to be clean.
- You don't take to mirror the design unless yous're applying it to the inside window. If you accidentally mirrored it and are simply reading this now: well, just utilise information technology inside!
- Don't touch the vinyl adhesive. Only like applying a sticker to a muddied surface, the agglutinative will option upwardly the oils and pare from your manus and exist a lot less effective.
- Exist gentle when removing the vinyl backing. Once you take the transfer record coming off, merely remove information technology slowly, yous'll save fourth dimension past spending a bit more right now.
- If you are applying the decals to your paint, simply be careful that you don't employ too strong of an adhesive or you could see some paint coming off if yous remove them. You could work with something like Oracal 631 which is a semi-permanent removable vinyl with a less potent adhesive.
Conclusion
So, a little bonus. If you've followed this guide on how to make your own automobile decal at home, yous've actually learned how to make a 2d projection I didn't fifty-fifty mention.
Can yous guess it?
Window decals for your home!
I beloved decorating my windows for the holidays. For a while, I used those pre-made gels that you can buy at the store (which I yet love). Merely now I can customize those designs and make annihilation I desire!
If you have any questions, please allow me know in the comments! And share your projects!
Car decaling is super easy, and while I just covered applying them to windows in this tutorial, the same principles apply to putting them on your car bumper or any other area of your motorcar.
Just listen the above advice nearly removing them later on!
FAQ
How can I remove a automobile decal?
You tin can either use a less potent adhesive like Oracal 631 or gently heat information technology up with a hairdryer and peel from 1 edge. Y'all'll have some adhesive goo leftover, you lot tin can use Goo Gone or a similar product, just brand certain it doesn't get down into the safe seals. You'll too want to clean it off after and then there'due south no Goo Gone residue left.
How intricate can the blueprint be?
This depends on if you're cutting with a cutting machine and laying out your blueprint in something like Cricut Design Space. Likewise, how patient yous are with weeding vinyl. I'd try a simple pattern offset and then get more audacious later on.
Tin can I identify a decal on my bumper or motorcar pigment?
Absolutely! The adhesive in permanent outdoor vinyl (like Oracal 651) is extremely condom to use on a car. Oracal 751 is ofttimes used for car wraps and it uses the verbal same adhesive backing (it's only a flake thinner and easier to use to a complex surface similar a machine).
What should I use to clean?
I like using only plain water, but you tin can add a little bit of dish detergent if information technology'south particularly dirty. To make sure it's dry afterward, make clean with some rubbing alcohol.
Can I put information technology on the inside?
Yup! You'll accept to mirror the design, but this is a keen way of keeping it prophylactic from the weather and looking corking for a long time.
Will the decal survive a car wash?
Yes, information technology's fine to apply a automobile wash! I'd wait around a week or then for the adhesive to cure, only after that you lot're proficient to become.
What about windshield wipers?
The decal will probably be fine, but you can wear away your wipers a flake faster. I unremarkably place my designs where the wipers don't hitting them, or I apply the inside window.
What kind of vinyl tin I use for a decal?
I adopt Oracal 651. If yous're using a large design that wraps around the car or has to profile to its surface, you'll want Oracal 751. I go through the differences between 651 and 751 in this commodity.
What about machine decal vinyl?
There isn't actually a vinyl specifically made for only cars, so the above recommendations are what will piece of work the all-time.
Will information technology interfere with heater coils?
Nope! The heater coils volition keep working just fine, and they won't damage the vinyl at all. The number one enemy of vinyl is almost always the sunday and its UV light, so you can either place the decals within because your drinking glass will filter some of the UV, or you can place them outside and 651 is rated for a minimum of half-dozen years.
How do I give a motorcar decal as a gift?
If yous're selling them or giving them to friends, I'd put them on the transfer record and give them that way. If they don't have a scraper to use for applying, they can just employ an erstwhile credit carte.
What'south the difference between a car sticker and a decal?
Basically the same thing! Stickers (like a bumper sticker) usually are printed and a diversity of colors. A decal is cut unremarkably of a single colour of vinyl, although there is printable vinyl also that yous can use.
Sources
- https://assistance.cricut.com/hc/en-us/sections/360002022794-Vinyl
- https://cfpub.epa.gov/npstbx/files/KSMO_CarWashing.pdf
Source: https://www.cutcutcraft.com/vinyl-car-decals/
Posted by: medinapealis.blogspot.com
0 Response to "How To Make Window Decals Cricut"
Post a Comment